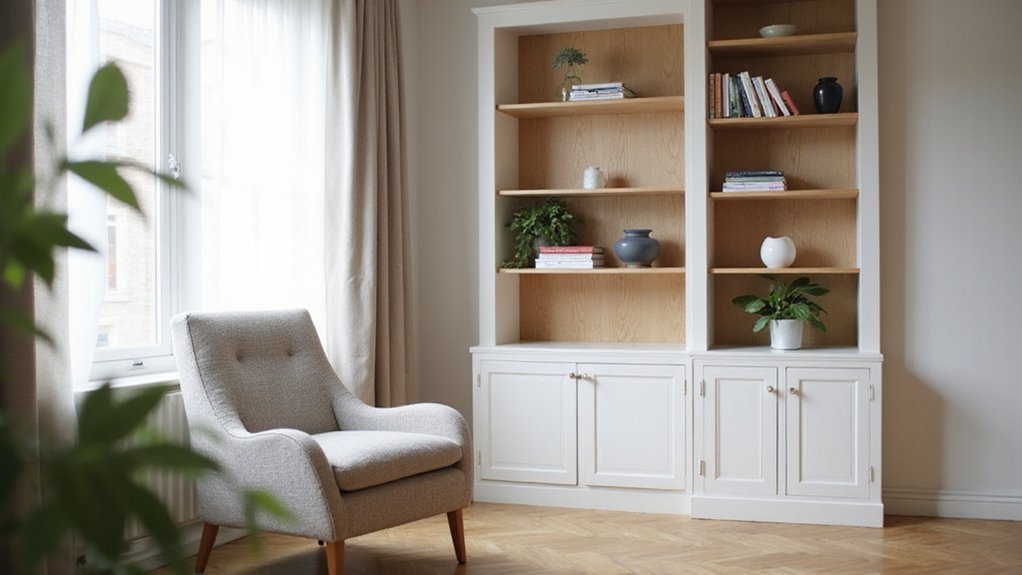
If you’re wondering how to make your bookcase look like it’s built into the wall rather than just standing there, you’re in the right place. A few simple steps can transform your freestanding unit into a seamless part of your space.
By the end, you’ll know exactly how to achieve a sleek, built-in look that hides the seams and gives your room a polished feel.
Why Your Bookcase Doesn’t Look Built-In (Fix This First)?
Your bookcase doesn’t look built-in because of several common styling mistakes. First, using identical decorative accents across every shelf reduces visual depth and makes the piece feel flat. To fix this, vary the objects you display—mix books, small sculptures, plants, and framed photos to create visual interest. Before styling, ensure the bookcase is actually raised off the carpet by constructing a base, as this grounds the unit and mimics permanent cabinetry. Applying the principle of vertical storage solutions from kitchen organization can also help maximize shelf space and create a cleaner, custom appearance.
Even spacing between objects can create clutter instead of architecture. Group items in odd-numbered clusters, such as three or five, which feel more natural and balanced. Avoid lining everything up perfectly; instead, stagger items to add a sense of movement. Using only one type of object or material can also make your shelves look monotonous. Incorporate different textures, finishes, and heights to enrich the visual texture. For secure installation, remember that mounting the unit to the wall requires drywall wall anchors to hold it firmly in place. If you need to support heavier objects, choosing a high-quality 60 inch wall shelf with brackets ensures both stability and style.
Lighting is another crucial element often overlooked. Without integrated lighting, your shelves lose that polished, custom glow at night. Installing LED strip lights or spotlights can highlight your display and seamlessly merge the bookcase with the surrounding architecture. First, address these styling errors—once you improve object placement, variety, and lighting, your bookcase will transition from a freestanding piece to a cohesive part of your home’s design.
How to Prep the Wall and Remove Obstacles for a Flush Fit
To prep the wall and remove obstacles for a flush fit, start by identifying any electrical outlets or wiring that may obstruct the placement of your bookcase. Plan your cord routing by drilling 1-inch holes behind lights or fixtures, allowing cords to pass through the header board discreetly. Carefully remove baseboards and molding by cutting through the seal with a utility knife to prevent damage to the wall. Clear all nearby furniture from the area and lay down a drop cloth to protect the flooring. Ensure the framing hits as many studs as possible for superior stability. While clearing obstacles, apply smart cabinet organization methods to temporarily store small hardware and tools in labeled containers for easy retrieval. Properly preparing the space ensures your unit sits flush against the wall and ceiling, creating a seamless appearance. For added safety without damaging the wall, consider using adhesive furniture anchors that secure the bookcase to the wall without drilling. When adjusting your framing, you can build a custom ledger board from scrap 2x4s to support the top of the bookcase against the ceiling for a tighter fit.
Tools and Materials Needed for the Built-In Bookcase Upgrade
To upgrade your built-in bookcase efficiently and professionally, you need a specific set of tools and materials. Start with measurement and marking tools: a measuring tape, a stud finder, and a long level to ensure precise placement and alignment. Power tools will speed up cutting and assembly; these include a circular saw with a guide, a nail gun, and an oscillating tool for versatile tasks.
For the structure, stock cabinets provide a sturdy base. Shelves and facing components are best made from ½-inch MDF and pine lumber, such as 1×2-inch and 1×4-inch pieces. Pay close attention when learning how to hang a floating shelf to avoid common misalignment issues. Finishing touches require materials like primer, paint, paintable caulk, and wood filler to achieve a seamless look. Decorative accents, including trim details like crown molding and baseboards, enhance visual appeal.
Lighting adds ambiance and functionality; consider puck lights or similar solutions for subtle illumination. Safety should not be overlooked: use drop cloths to protect your workspace, shims for adjustments, and furniture anchors to secure the bookcase for stability. Essential smaller tools include a utility knife, wood glue, clamps, and a square for precise assembly and smooth finishes. Having these tools and materials ready makes your project much more manageable and results in a professional-looking built-in.
Build a Top Box Extension to Reach the Ceiling
To build a top box extension that reaches the ceiling, start by measuring the ceiling height and subtract 4 inches for crown molding clearance. Cut the top box frame from 1×2 or 1×4 boards to match the exact width of your existing bookcase. Nail the pieces together at the corners with finish nails, forming a rigid rectangular perimeter. Use a combination square to verify squareness; precise dimensions are key to achieving a seamless, built-in appearance. When selecting hardware for securing the frame, choose masonry wall anchors if the top box will be attached to a concrete or brick wall. Organize your tools and materials in the garage before starting to ensure efficient workflow is maintained throughout the project. For a more cost-effective option, a bookshelf offers less substantial durability than a bookcase, which may influence your choice of extension materials.
Place this square top box directly on top of your bookcase, aligning it flush with the front and side edges. Secure it by driving wood screws through the frame bottom into the top of the bookcase, ensuring the sides are tightly clamped to prevent shifting during installation. For electrical access, measure from the bookcase edges to the center of the outlet. Cut a rectangular hole in the top box’s plywood back, slightly smaller than the electrical box opening. Install a box extender to bring the outlet forward for easy access, reattaching it securely with extra-long #6-32 bolts. If your bookcase lacks pre-drilled holes for the extension, trace the holes from a compatible extension unit onto masking tape to ensure precise drilling placement.
Close the Bottom Gap and Add a Unified Back Panel
To close the bottom gap and add a unified back panel, start by securing the bookcases together through shelf peg holes at the top, middle, and bottom. Use screws and clamp the units tightly to prevent movement during assembly. Connect the units with connector bolts, and add floor wedges to keep the bolts steady. Cut a continuous back panel to span all the units, then screw it into place to lock everything together and hide internal seams. Apply the same closet organization by color approach to arrange books on the shelves for visual harmony. Secure shims beneath the units and cover the bottom gaps with quarter-round molding for a clean, finished look. Finally, apply wood putty over screw ends before painting to achieve a smooth, seamless surface. This approach creates a sturdy, integrated built-in appearance that neatly hides floor irregularities and internal seams. To further enhance organization, you might also apply practical storage ideas from pantry methods to keep items on the shelves neatly arranged. For additional design cohesion, consider incorporating dedicated plate racks within the shelves for displaying and storing dinnerware.
Use Trim and Molding to Hide Every Seam
Use trim and molding to hide every seam by carefully selecting and positioning each piece. Start with foundation trim by inserting 1×6 boards between bookcases to bridge inside corners. Next, add a 1×4 base at the bottom to serve as shoe molding. Wrap the base and side trim around the visible edges, continuing it seamlessly to the wall. Secure the bookcases to wall studs for stability, then nail cover strips over gaps between units to conceal any remaining seams. At the top, install crown molding with straight 90-degree cuts where it meets the wall, applying a thin bead of wood glue before nailing for extra hold. Wrap vertical sides with trim, such as fluted door molding, to hide cabinet edges and gaps. Incorporate decorative corner molding to ensure smooth, clean connections between trim pieces. To achieve a polished look, drive nails below the surface of shelf trim, then fill the holes later for a seamless finish. Side frames are nailed to the sides and face frames are glued and nailed over the front to ensure all seams are hidden.
Fill, Caulk, and Paint for a Seamless Finish
To achieve a seamless finish, follow these filling, caulking, and painting steps carefully. First, fill all nail holes, screw dimples, and gaps with wood filler or painter’s putty. Use a putty knife to press it in flush with the surface, then allow it to dry completely. Once dry, sand the filled areas smooth to ensure an even surface. Next, cut your paintable caulk tube at a 45° angle, and apply a small bead along every seam where molding or shelves meet the wall. Dip your finger in water and immediately smooth the bead, wiping away any excess with a damp rag to create a clean, tight line. After the caulk has dried, prime the entire bookcase and let the primer dry overnight. When painting, spray from about 12 inches away, starting with the back wall inside the bookcase. Match the paint color to your wall for a cohesive look, applying two light coats and lightly sanding between coats for a smooth finish. If you prefer a textured effect, use a foam roller on the final coat to even out the sheen and conceal minor imperfections. Sand surfaces to at least 120 grit using a sanding block for a uniform surface before priming.