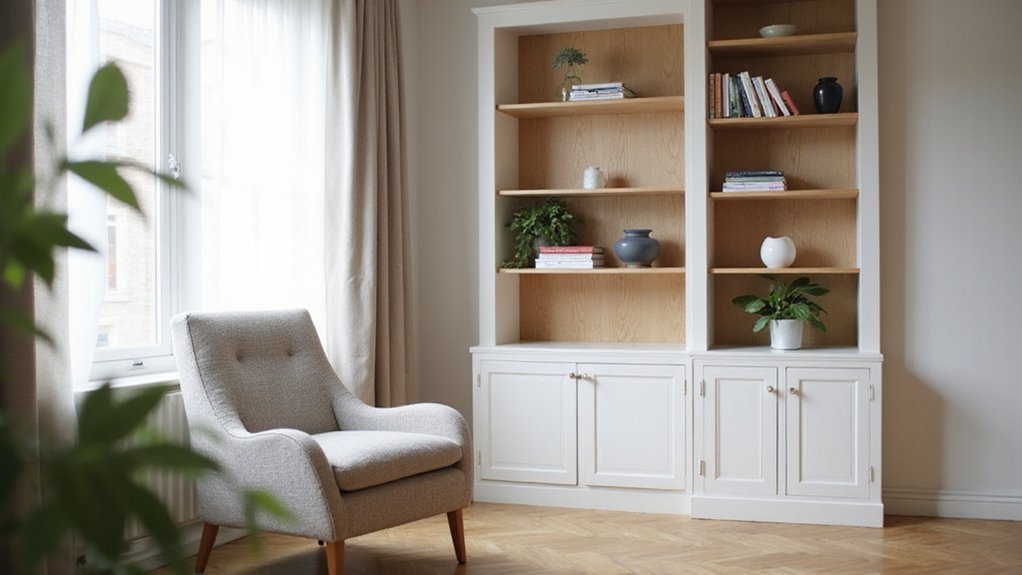
Looking to add doors to your bookcase but unsure where to start? The key is getting the measurements right and preparing your space.
With a few careful steps, you can give your unit a clean, built-in look that’s both functional and stylish.
Keep reading to learn how to transform your bookcase into a polished piece with doors that fit perfectly.
Measure Your Bookcase and Plan the Door Fit
Measuring your bookcase before selecting a door is essential to ensure a proper fit. Start by confirming that your bookcase’s dimensions fall within standard ranges: depth should be between 10 and 12 inches, width from 24 to 48 inches, and height from 36 to 84 inches. Use a tape measure to determine the exact clear opening width and height, taking measurements at three different spots. Record the smallest of these numbers to account for any irregularities or slight variations in your shelves. This precise measurement prevents doors that are too large or too small, which can cause sticking or incomplete coverage. If your bookcase is made of drywall-backed shelving, you may need to use wall anchors to secure the door frame for added stability. For a professional finish, always ensure the cabinet is anchored to the wall to prevent tipping hazards during daily use. You can also consult DIY plans for custom closet systems to guide your measurement process.
Next, round your height measurement up to the nearest inch. Subtract two inches to allow for clearance when the door swings open. This calculation gives you the exact height your door should be for an easy, snag-free fit. Be sure to also verify hinge placement options so that when you install hinges, the door will swing freely without hitting shelves or walls. Taking these steps carefully saves time, avoids costly mistakes, and makes the door fitting process much smoother. You must adjust door dimensions for overlay and hinge clearance to ensure the door fits properly against the bookcase frame.
Remove the Shelves and Anchor the Bookcase to the Wall
Remove the shelves and anchor the bookcase to the wall. Start by emptying the unit completely, removing all items from each shelf and clearing the surrounding floor area. Lay down a protective sheet to prevent damage. Wear gloves and eyewear for safety as you locate fasteners with a magnet or your fingers. Unscrew visible supports, use a pry bar for stubborn shelves, or cut glued ones with a saw. Carefully remove each shelf in sequence to avoid stressing the frame and protect the finish with a chopping board or similar leverage. These techniques ensure the bookcase stays intact during removal. Lift shelves carefully to keep them flat and prevent damage, as bending and pulling straight out from the wall avoids unnecessary stress on the drywall. Consider incorporating decorative built-in styling to enhance the final look of the frame. Using a level and shims during installation ensures the bracket system is perfectly aligned for a clean result.
Once the shelves are removed, it is crucial to anchor the bookcase to the wall. For safety reasons, any unit over five feet tall should be securely fastened. Use a level to ensure the unit is even side to side and front to back; shims can be added for uneven floors. Find wall studs behind the sides of the bookcase and attach an anti-tip strap or lag screws into these studs. Check the frame’s squareness by measuring diagonally across the corners before tightening all fasteners, ensuring stability and preventing tipping.
Choose Between Plywood, Pre-Made Panels, or Glass for Doors
Plywood, pre-made solid wood panels, and glass each serve different needs for your bookcase doors. Plywood is a versatile choice that you can customize by using 3/4-inch stock with solid wood front edges to increase rigidity and highlight the wood grain. Baltic birch plywood is especially good for wide spans because it resists sagging, making it suitable for large doors. Coated plywood works well in garage environments where moisture resistance is important. For a DIY garage shelf system, building with 2x4s provides a sturdy and cost-effective foundation. Pre-made solid hardwood panels such as oak, maple, or cherry can cost between $500 and $1,200 but provide superior torsional stiffness and durability. Be sure to check that the core isn’t veneer over a less solid substrate to ensure longevity. For a similar appearance, you can build doors from your own glued panels of solid wood like White Oak, as was done with planed 1x6s and 1x4s for the sides and shelves. If you prefer a built-in look with integrated storage, consider a plate rack design that combines functionality with style. Applying organization methods inspired by under-sink storage can help keep the interior shelves clutter-free and accessible.
Glass doors are ideal if you want a dust-proof display area for collectibles. Tempered safety glass under 54 inches in height is required for safety reasons, and it should be secured with glazier’s points for stability. Glass provides a clear view that enhances display but requires careful handling during installation. Alternatively, acrylic can be used for door glazing in place of traditional glass, as was done in one project to minimize weight and handling concerns. Finally, match your door finish to the room’s style, but avoid low-grade veneer plywood because its edges tend to chip or peel over time, detracting from the overall look.
Cut and Assemble Door Frames and Panels
Measure the internal openings between stiles and rails. Add 3/4 inch to both the width and height of the opening for your panel dimensions, allowing a 2-millimeter gap to prevent tight fits. Cut 45-degree miters on 1×4 select pine for the outer frame, ensuring precise angles for tight joints. Route a ½-inch channel, 3/8-inch deep, along the inside edge to seat the panel securely. Cut small tongues at the ends of the rails, centered on their thickness, and dry-fit them to check for gaps and proper fit. Confirm the inside rail distance is adjusted to 409 mm for proper alignment before final cuts. When preparing your work area, secure the closet rod brackets at a consistent height to ensure level support for hanging items. A Lazy Susan can provide convenient access to items stored deep inside closets or cabinets. For similar projects, covering wire shelves with solid panels can improve both appearance and durability.
Assemble the frame with wood glue and clamps, making sure the corners are square. Reinforce the joints with brad nails for added strength. Use 90-degree squares during assembly to keep the frame perfectly square. Measure the diagonals of the frame and adjust as needed until they match, confirming squareness.
Insert the panel into the routed channel, allowing it to float freely inside the frame. Remember to plan hinge placement before final assembly. Make sure the frame joints are tight and square so the door will hang properly later.
Sand Panels, Apply Liquid Nails, and Fill Gaps With Caulk
Start by sanding the panels with a medium-grit sponge until the surface feels smooth and ready for adhesion. Clean all dust and debris from the sanded areas to ensure proper bonding when applying Liquid Nails. Spread a generous layer of Liquid Nails into the routed channels, then press each panel firmly into place, holding it until it adheres securely. After pressing the panels into place, ensure the beveled inside panel adds a decorative, fancy look to the bookcase. Check that the panel is level and fully seated, just as you would verify the wall studs are solid before hanging a floating shelf.
Before finishing, fill any nail holes with wood putty and sand them flush to create a seamless surface. Apply a thin bead of caulk along all joints and seams to hide gaps and prevent moisture intrusion. Use your finger to smooth the caulk into the seams immediately, wiping away excess for a neat finish. Checking the alignment by measuring diagonally from corner to corner will help verify that your panels are square, ensuring your doors hang correctly and the overall finish is professional. Take your time with putty, sanding, and caulking, as meticulous prep is key to a flawless outcome before painting.
Paint the Doors With Two Coats Before Hanging
Before hanging, you should apply two coats of paint to ensure a smooth, durable finish. For enhanced adhesion, use a spray-on undercoat before applying the first coat. Start by choosing a high-quality, door-appropriate paint and apply the first coat evenly with a brush or roller, avoiding heavy application that can cause drips. Allow this coat to dry completely, typically 4 to 6 hours, depending on the paint type. Once dry, inspect the surface for missed spots or thin areas, and lightly sand if needed to promote adhesion. Consider using a vertical storage rack to keep the painted doors upright and dust-free while drying. You can also store painting supplies on deep pantry shelves to keep your workspace organized. This approach mirrors the organized jewelry storage principle of keeping items separated and accessible.
Apply the second coat in the same manner, using light, even strokes to prevent drips and runs. Focus on maintaining a consistent thickness across the door. Wait at least 24 hours for the paint to dry fully before handling or reattaching hardware. Full curing for durability may take 1 to 5 days, depending on the specific paint used. Proper application of two coats guarantees a professional look and long-lasting protection, setting a solid foundation before re-hanging the door.
Attach Hinges to Doors First for Perfect Alignment
Attaching hinges to the door first ensures perfect alignment before fitting the frame. Start by matching your hinge material to the door weight—use steel hinges for heavy doors to provide extra strength, and brass hinges for lighter doors for a smooth finish. When selecting hardware, consider the same principles used for choosing pegboard hooks to match the weight and material of your project. Mark the top hinge 7 inches from the top edge and the bottom hinge 11 inches from the bottom edge. Use a square and pencil to trace the hinge outline onto the door, then carefully carve out the mortise with a utility knife. Ensure the mortise depth allows each hinge leaf to sit flush against the door edge for a seamless look. For projects involving metal doors, the technique of cutting wire shelving can help you trim excess materials to fit precisely. Organizing similar hardware by labeling containers keeps small parts accessible and reduces time spent searching.
Attach the hinges to the door first by inserting screws loosely. Check that each hinge is perfectly flush with the door edge to prevent gaps or protrusions, which can cause misalignment later. Pre-drill screw holes that match the screw’s center shaft size to avoid splitting the wood. Once all hinges are temporarily mounted and verified, transfer the hinge marks to the frame without the door in place. This method allows you to position the door accurately and with less effort later, providing a solid foundation for smooth operation. Before finalizing the frame attachment, evaluate the door’s fit after each incremental adjustment to gauge alignment and prevent jamming.
Hang the Doors and Fine-Tune the Gaps
To hang doors perfectly in the opening, start by propping them with shims or books to match the desired height. Mark the screw holes through the open hinges, ensuring the hinges are slightly loose to allow for adjustments. Use a level to check that the doors are aligned vertically and horizontally. Adjust the hinge screws to fine-tune the depth and spacing, turning the center screw on the hinge arm if the door gaps away from the frame. If the door is too close to the bookcase, use the screw nearest the frame. Verify that both doors meet evenly in the center with no gaps. Once satisfied with the alignment, tighten all hinge screws securely. For lasting results, apply deep drawer organization principles to keep the hardware area tidy. Confirm that the doors close easily and lie flush against the front of the bookcase. After tightening, recheck the alignment—no movement should occur. Finally, drive in any remaining screws, then remove temporary supports. If any screws from the bookcase are mounted with wall anchors, remove them safely by pulling them straight while wiggling to avoid wall damage.
Install Handles, Then Seal With a Clear Coat
After selecting and positioning your handles, mark their exact locations by measuring the door width to find the center point. For handle placement, position wall cabinet pulls 2 to 3 inches from the bottom corner, and base cabinet handles the same distance from the top corner. Place them opposite the hinges for ergonomic access. Use masking tape to prevent chipping during drilling, then drill pilot holes with a bit slightly smaller than your screw diameter. Insert screws from the back, tightening by hand first to avoid stripping the threads. Use diagonal lines from the taped corners to find the precise drill point intersections for perfectly centered handles.
Next, focus on sealing the new holes and exposed wood edges with a clear coat. Apply the sealant carefully to prevent moisture from getting in, and make sure not to obscure the handle hardware. Allow the clear coat to dry completely before using the doors. Choose a finish compatible with your bookcase material to maintain a consistent appearance.